Street Fighter Boards
Street Fighter Boards is backordered and will ship as soon as it is back in stock.
Couldn't load pickup availability
Description
Description
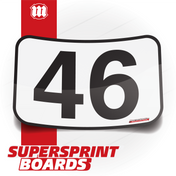
Win with flair, ready to design race numbers
Stand out on the track with Street Fighter Race Numbers, made for racers who are ready to boast sleek, GT styling.
Featuring a timeless shape with rounded corners, these number panels will give your race car a podium finish result.
These number panels are:
✅ Ready for your logos, colors, and fonts
✅ GT-Inspired
✅ Produced with winning Arlon and 3M materials
✅ Compliant size options available
Choose The Right Number Panel:
🔹 Magnetic Race Numbers stick to steel doors and panels only. These are ideal for street-driven cars on track. Their strong magnetic force will ensure your panels stay in place on flat surfaces. Carbon, Alloy and other composites are not suitable for magnet panels.
🔹 Vinyl Race Numbers are perfect permanent options. Made from high-tack vinyl, they feature a air-release backing making an easy dry install with no bubbles. Sticks to all glossy surfaces. MRN stands by our products for the harshest wheel to wheel battles across the circuit.
Perfect for:
🏁 Track Day Drivers & Motorsport Enthusiasts – Get a competitive race look in seconds.
🏁 Club Racers & Time Attack Competitors – Compliant with event regulations while making your race car stand out.
🏁 Motorsport Teams – Enhance branding and sponsorship opportunities with high-quality, bold race numbers.
💥 Unleash our Street Fighters on your race car – Order today! 💥
Sometimes, installing your first sticker maybe daunting, but with our MRN products, and some helpful tricks to boost your confidence - you'll be fitting up the entire scrutineering line with decals.
-----
Did you know!
You may get given a decal with application tape. Referred as app tape, it's typically used to keep separated vinyl together. For example, a Drivers' Name. Other decals may not require the app tape.
-----
Some tips!
Placement. This one is up for debate, but rule of thumb is:
- Race numbers - located upper most front section of the front doors. For aesthetics, angle the number panel along the natural lines of the car. Works for most other graphics too!
- Windscreen banners, measuring from the centre point of windshield, the total height is around 120mm +/- (street car) to 240mm +/- (race car). Use masking tape to hold into position, then inspect from afar back and also in the cockpit, adjust height accordingly.
Tools needed.
- You'd preferably want a squeegee, extra points if it's felt tip. At last resort, use a credit card wrapped in a microfibre cloth
- Scissors, or preferably a 30-degree safety knife (make sure it's new and sharp).
- Masking tape, or magnets
- Surface cleaner, either Isopropyl Alcohol or Avery Surface Cleaner. Don't use Glass Cleaner.
Cleaning the surface. Don't skip this step. After washing your car, avoid using any waxes. Using a clean microfibre towel and your cleaner, thoroughly spray the outer panel and wipe clean, twice! Do so again behind all door jams, body gaps, under rubber moulds, and all. Anywhere within 200mm of your installation area.
Installation Guide.
Step 1: Clean, Position and Tape
Clean thoroughly your doors from any oils, grime and dirt using either an isopropyl alcohol or similar cleaner and a microfibre towel.
Using masking tape, apply horizontally across the uninstalled sticker with 3” overhang, tacking it to the door/bonnet. Step back 5-10m, check for alignment, angle and position. This tape, is called your “hinge”

Step 2: Peel and Trim
Once the hinge is secured to the body, carefully peel the vinyl away from the backing paper up to the hinge line. Using scissors or a blade, trim off the exposed backing. Be careful not to scratch your paint with a blade!

Step 3: Start Squeegeeing
Using your MRN felt-tipped squeegee (or a credit card wrapped with cloth), apply left and right upward overlapping strokes, with medium to firm even pressure.

Step 4: Peel & Work Downward
Now you can remove the “hinge” masking tape. Using the same overlapping squeegee left and right strokes, begin to slowly peel the remaining backing paper downward, working methodically.

Step 5: Continue Stroking til the end
Repeat the left and right overlapping strokes with medium pressure, downward as the backing paper is relieved. Ensure all the edges are sealed down.

Step 6: Admire and Conquer
Once complete, step back, admire and measure placement to make the other side symetrical. You’re a master installer now!
And as your MRN Graphics provide at least 5hp, you should also be expecting faster lap times :) Please write us a review, tag us on socials, and share MRN within the pitlane.

Thank you,
Troy Seven
Race fast,
Troy Seven #25
Magnet Race Numbers.


Street Fighter Boards
Payment & Security
Payment methods
Your payment information is processed securely. We do not store credit card details nor have access to your credit card information.